With ** Gnoppix 25.11** and the Member images 26+, we’ve introduced a new UI for GPT-like usage of Ollama as a browser extension that runs directly in your browser.
Gnoppix has finally moved away from the heavyweight GUI application, replacing it with a lightweight browser extension.
Using Ollama directly from a terminal has certain limitations. To address this, we have implemented the following features:
- A user-friendly GUI for prompting.
- User chat history.
- Integration with Gnoppix AI models (Member).
- RAG (Retrieval-Augmented Generation).
- Fine-tuning of models.
- Export and integration for secure sharing on
https://paste.gnoppix.org. - Integration of other AI providers (Google, OpenAI).
- WebSearch integration.
- Custom prompts.
- Light/Dark theming.
- Translation into 17 different languages.
In case you do not have Gnoppix 25 or an API Key
Here you can download or get an API Key → https://landing.gnoppix.com
You still have the option to use Gnoppix AI remotely if you prefer not to run AI on your local Gnoppix system. We do not mandate the installation of AI. Gnoppix can be run as a pure Linux Distribution with no AI features enabled. The full capabilities are unlocked when you install the ai meta package.
The usage local-ai is tied to an installed system. In addition to other requirements, the system needs 30–50 GB of disk space. The models will run, with hardware auto-detection, using your NV-GPU or CPU. There is no comparison: with a GPU-based system, these smaller models fly, and we suggest utilizing the larger models for optimal performance.
Here is a step-by-step setup guide on how to use it. (Note: No internet connection is needed to run the local AI; no data leaves your computer.)
The basic requirement is Gnoppix 25.11 installed, you have successfully install the Gnoppix AI Meta package.
else run:
apt install gnoppix-ai
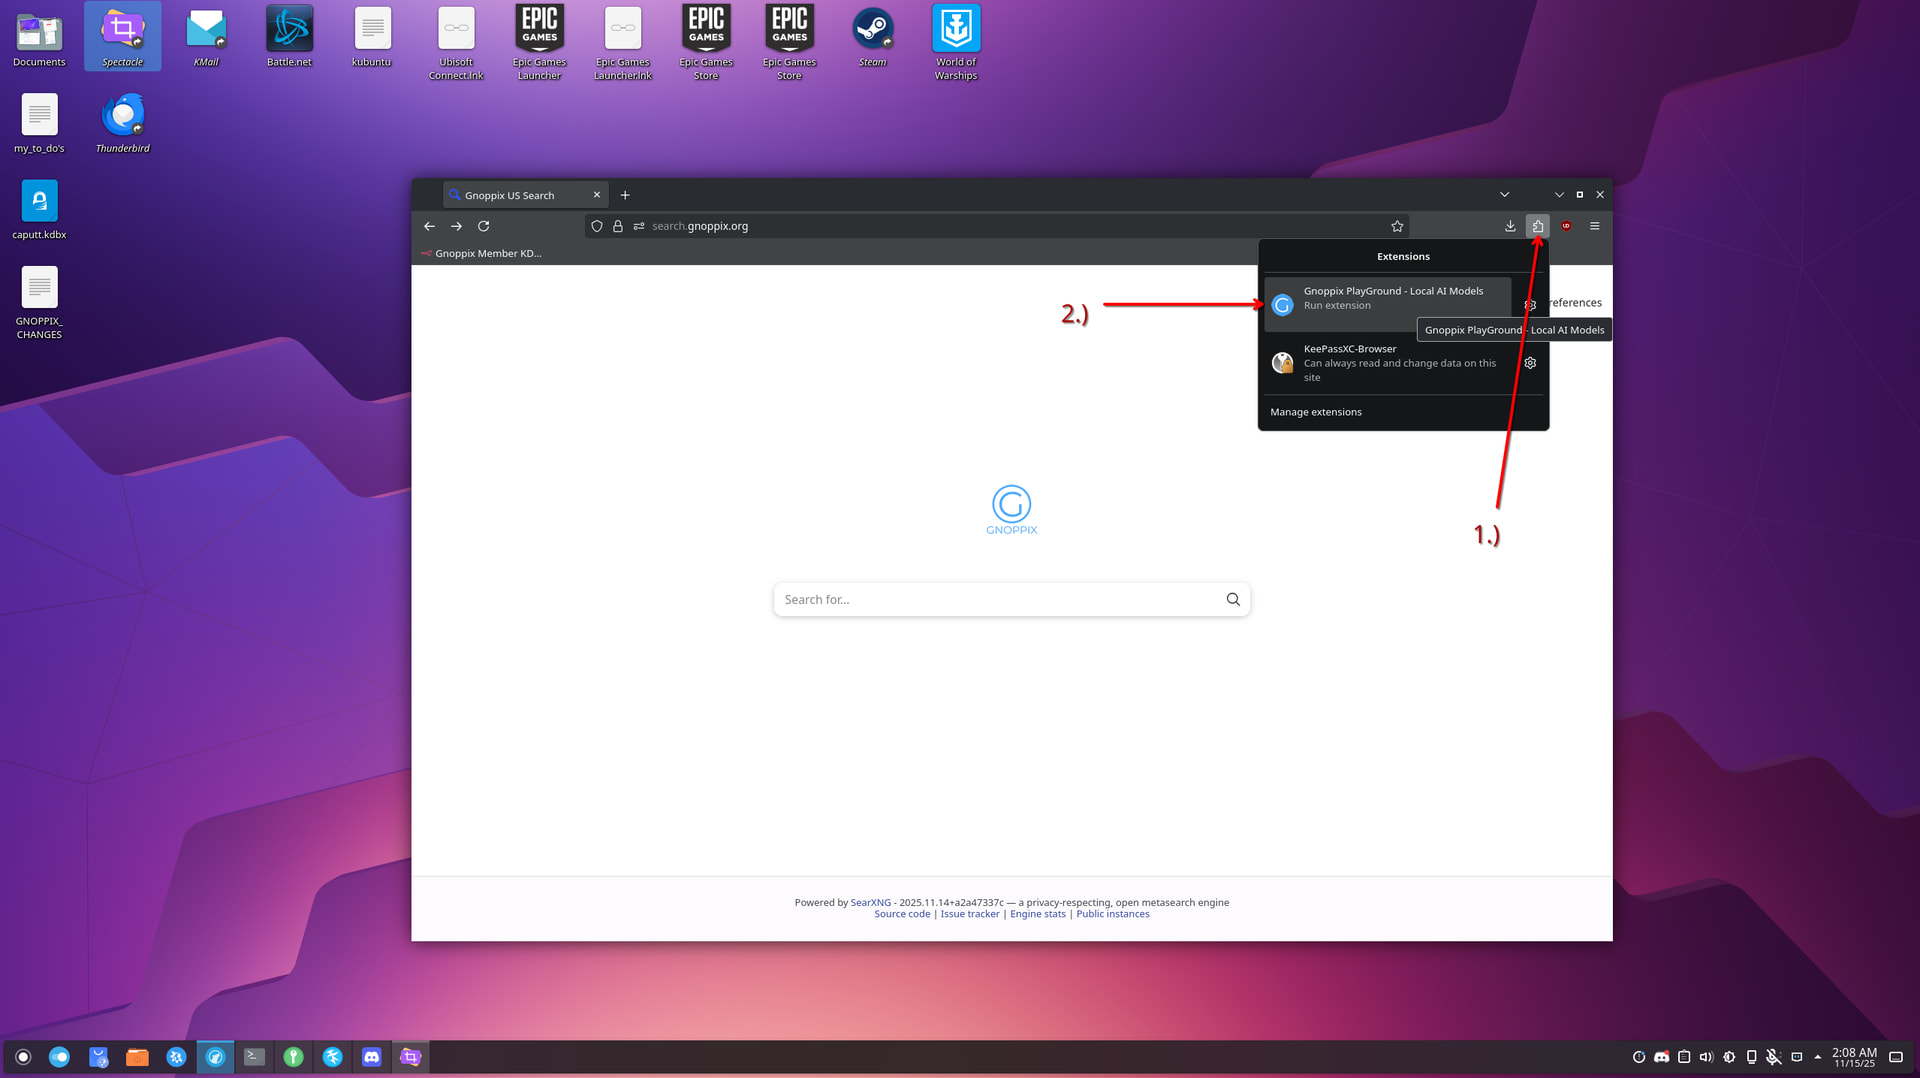
Step 1.)
- Open LibreWolf and press like it is shown on the pic 1.) and than 2.)
Step 2.)
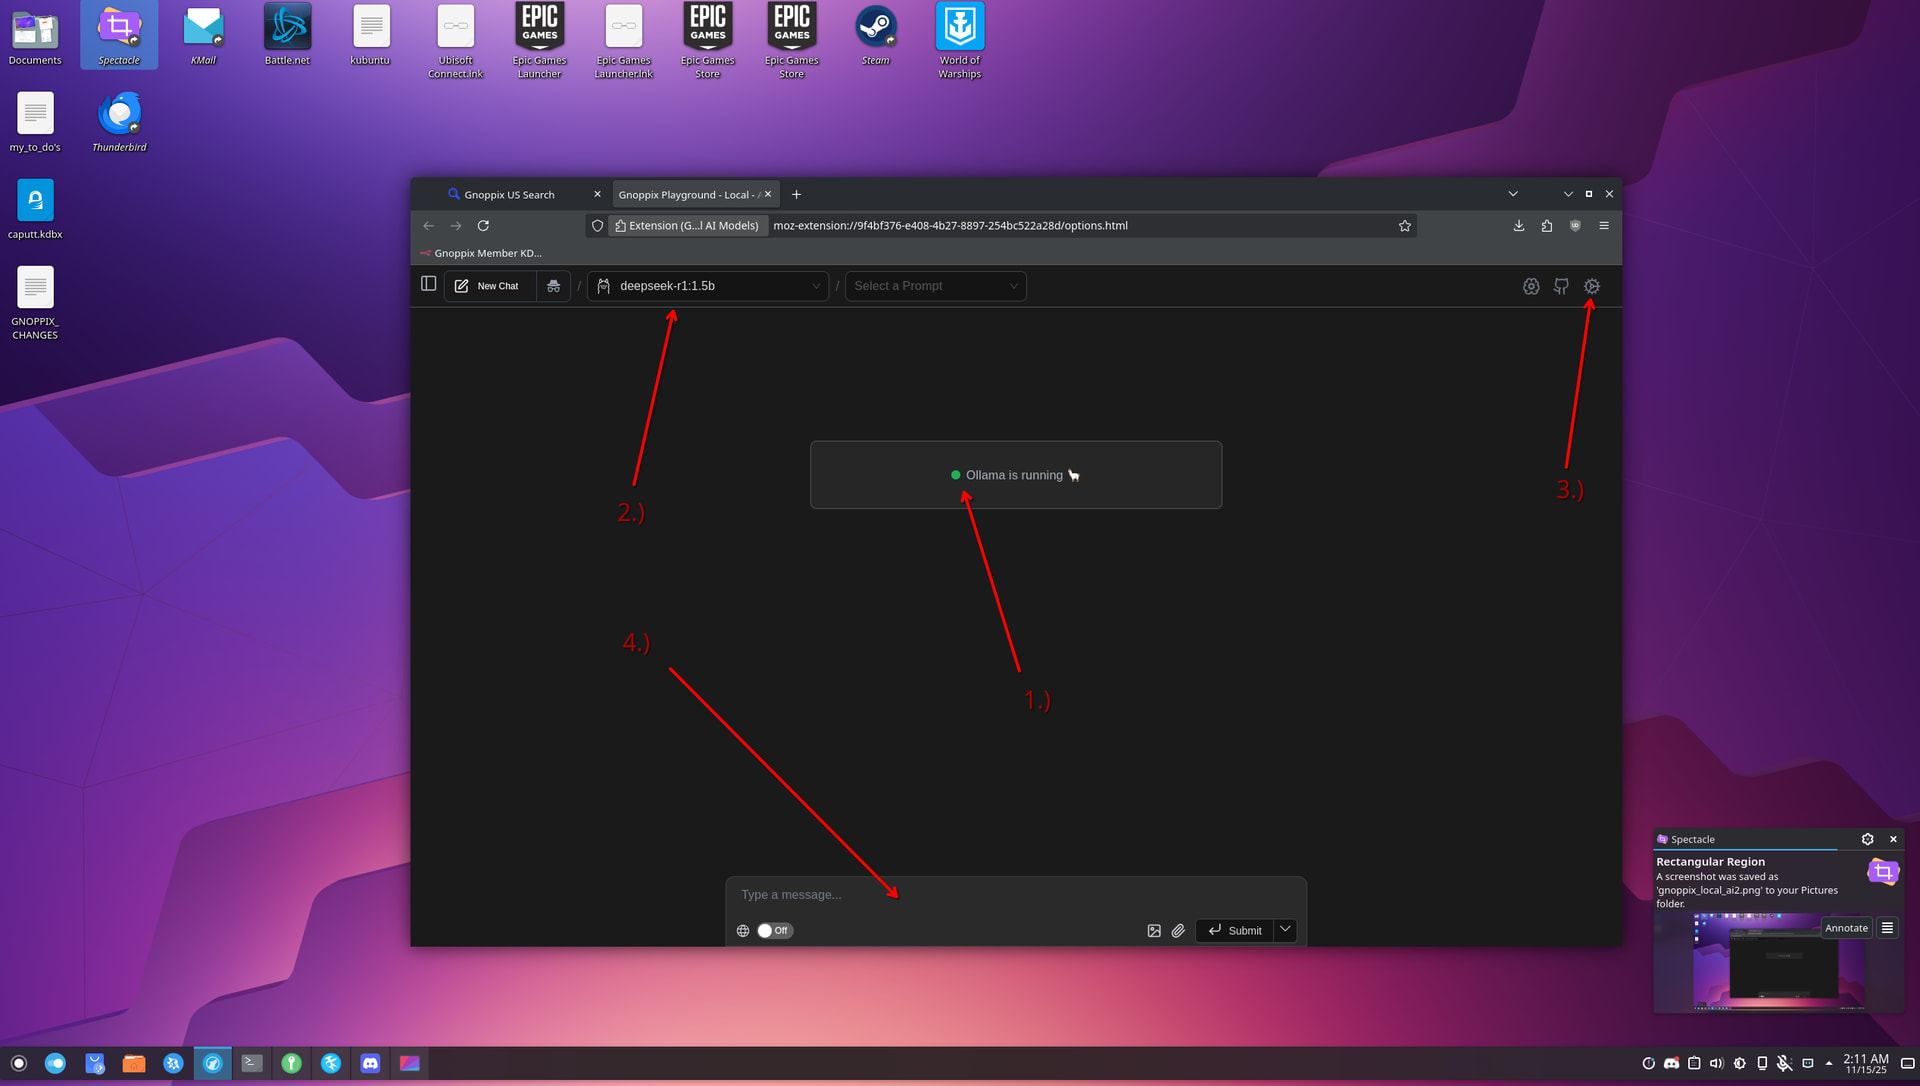
After Step 1.) You should see it like this
1.) make sure ollama is running, if it is not running a red button is shown.
2.) here you can choose between the installed models ( those are very small, small models mean not so accurate vs. bigger models.
3.) here you can configure / adjust your settings.
4.) the default is like this, type someting a hello or whatever.
The LLM models loads into ram. and stay there. 1st. load takes a while till everything is loaded ( same here, faster computer deliver faster results and DO NOT TRY to run this in a virtalbox)
Step 3.)
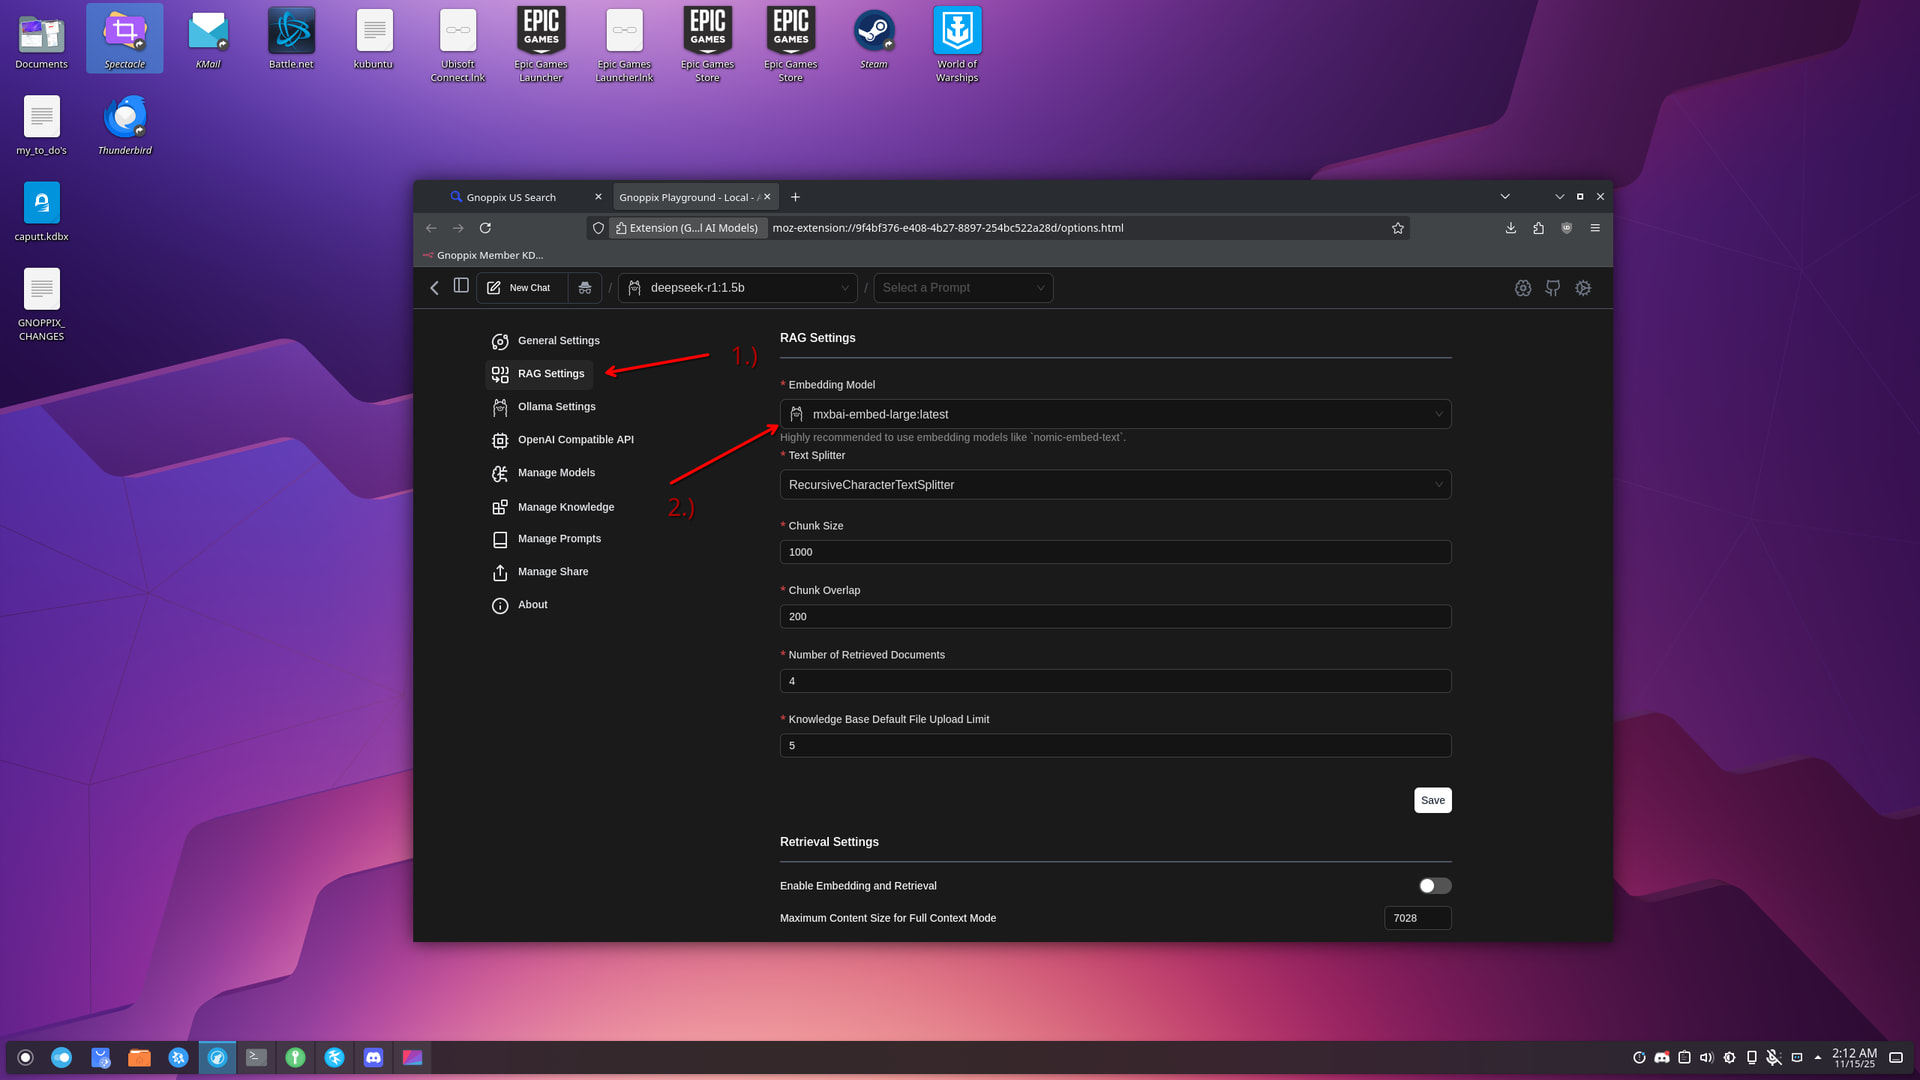
To configure RAG make sure the embed model (switching the embed models means in general re upload your documents!) This is already one of the best models incl. the paid one.
Just skip if you don’t use RAG
Step 4.)
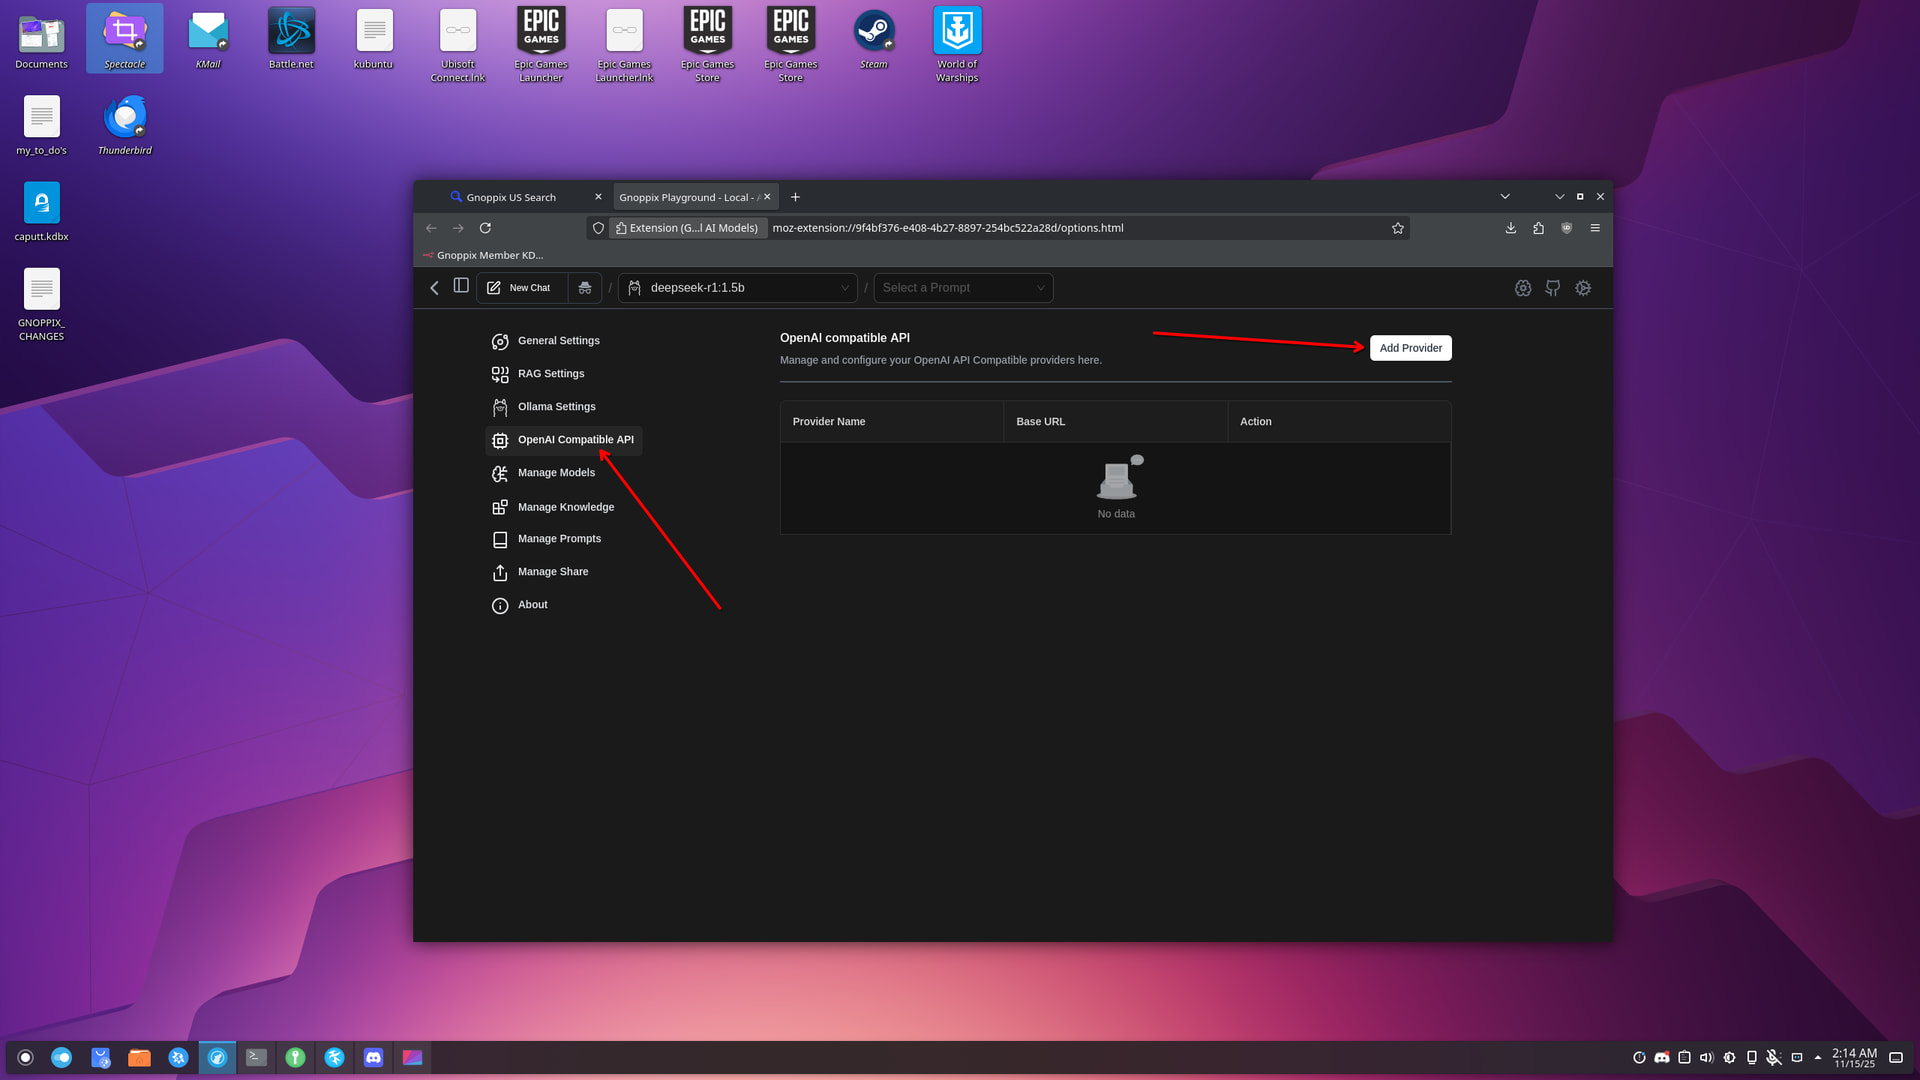
- Gnoppix member or paid users can use their API key here for more free models
- Gnoppix AI offer a OpenAI compatible API even for none OpenAI models
 that means if you coded an application for OpenAI and you want test how your code works with Google Gemini you do not re-write you code.
Click “Add Provider”
Step 5.)
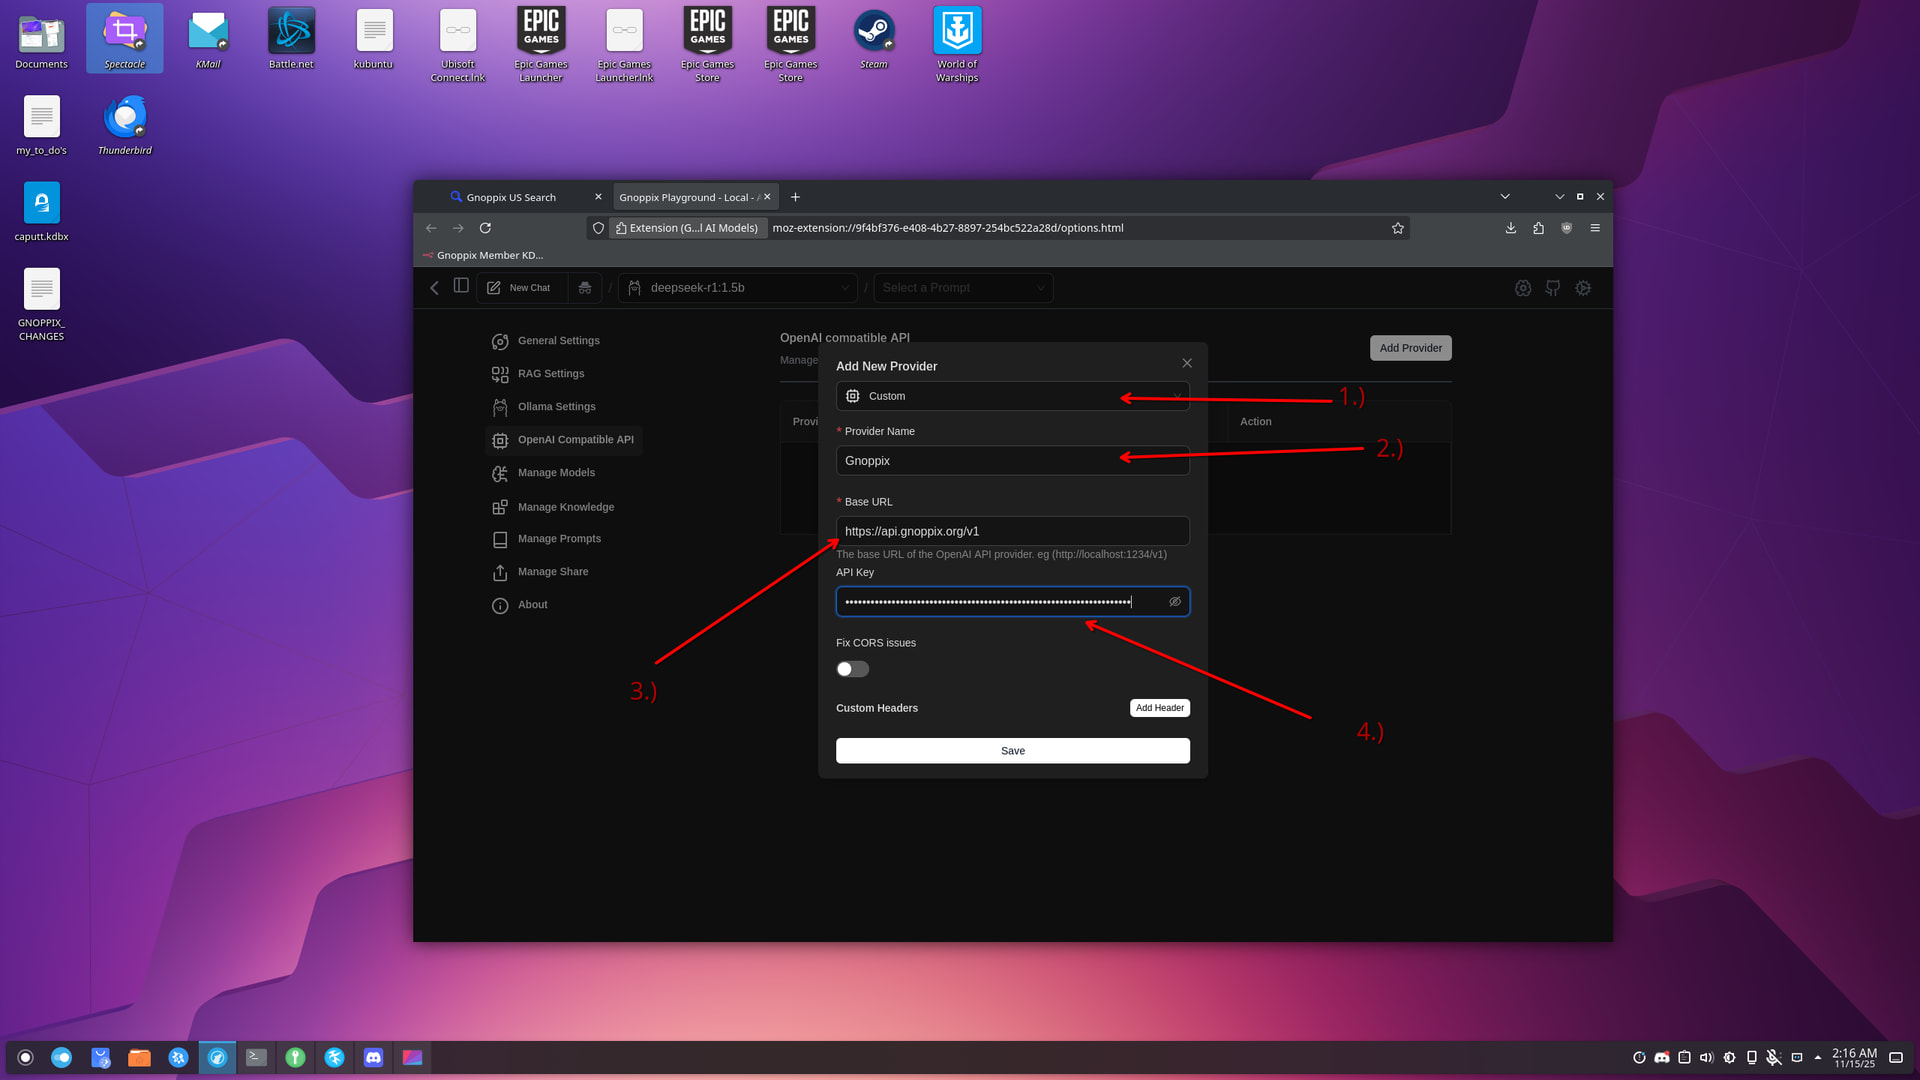
1.) Make sure “custom” you can use other Provider too, if you have an key for it.
2.) type Gnoppix
3.) Add the given Endpoint (Note: this depends on your subscription and can be different than here.) in general https://api.gnoppix.org
4.) Enter your given API KEY it start with sk-xxxxx
5.) Click on “Save” to save the settings
Step 6.)
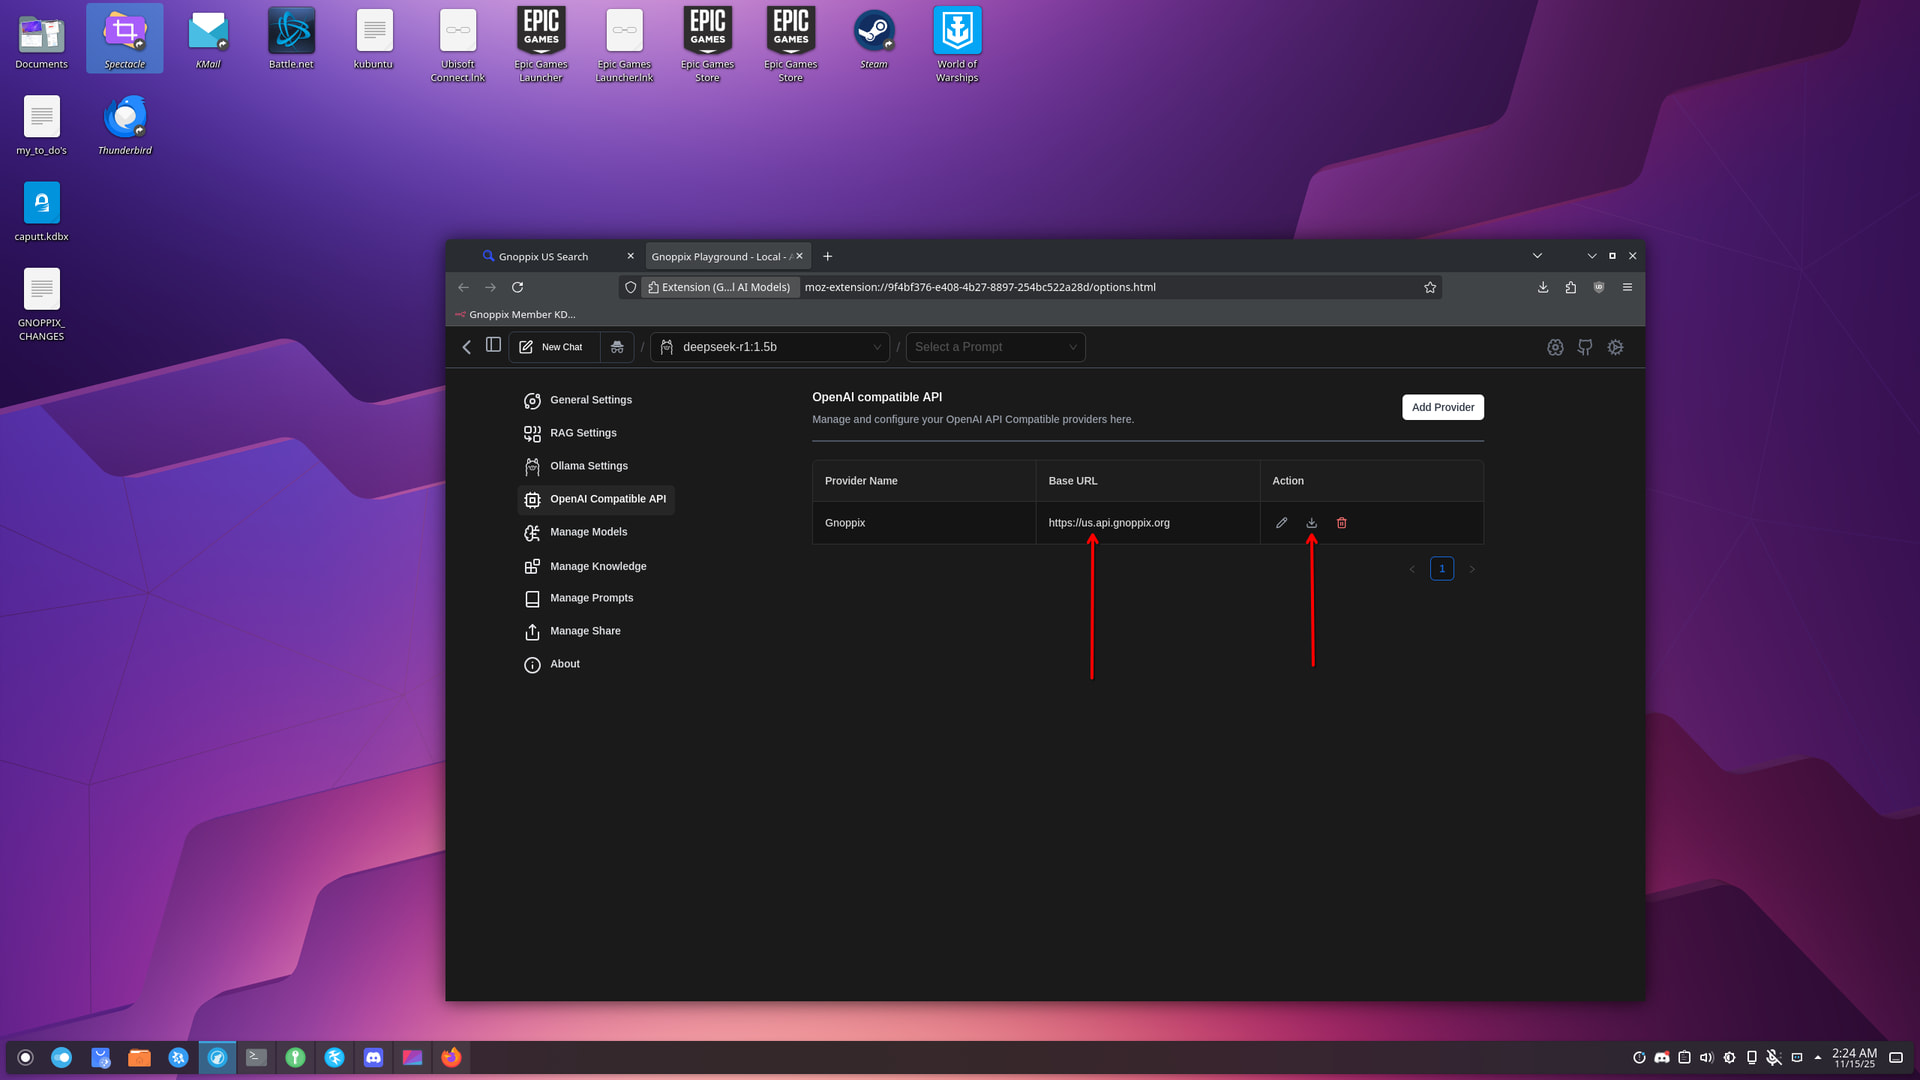
- After successful adding, it looks like this, press at Action the Download for all Models
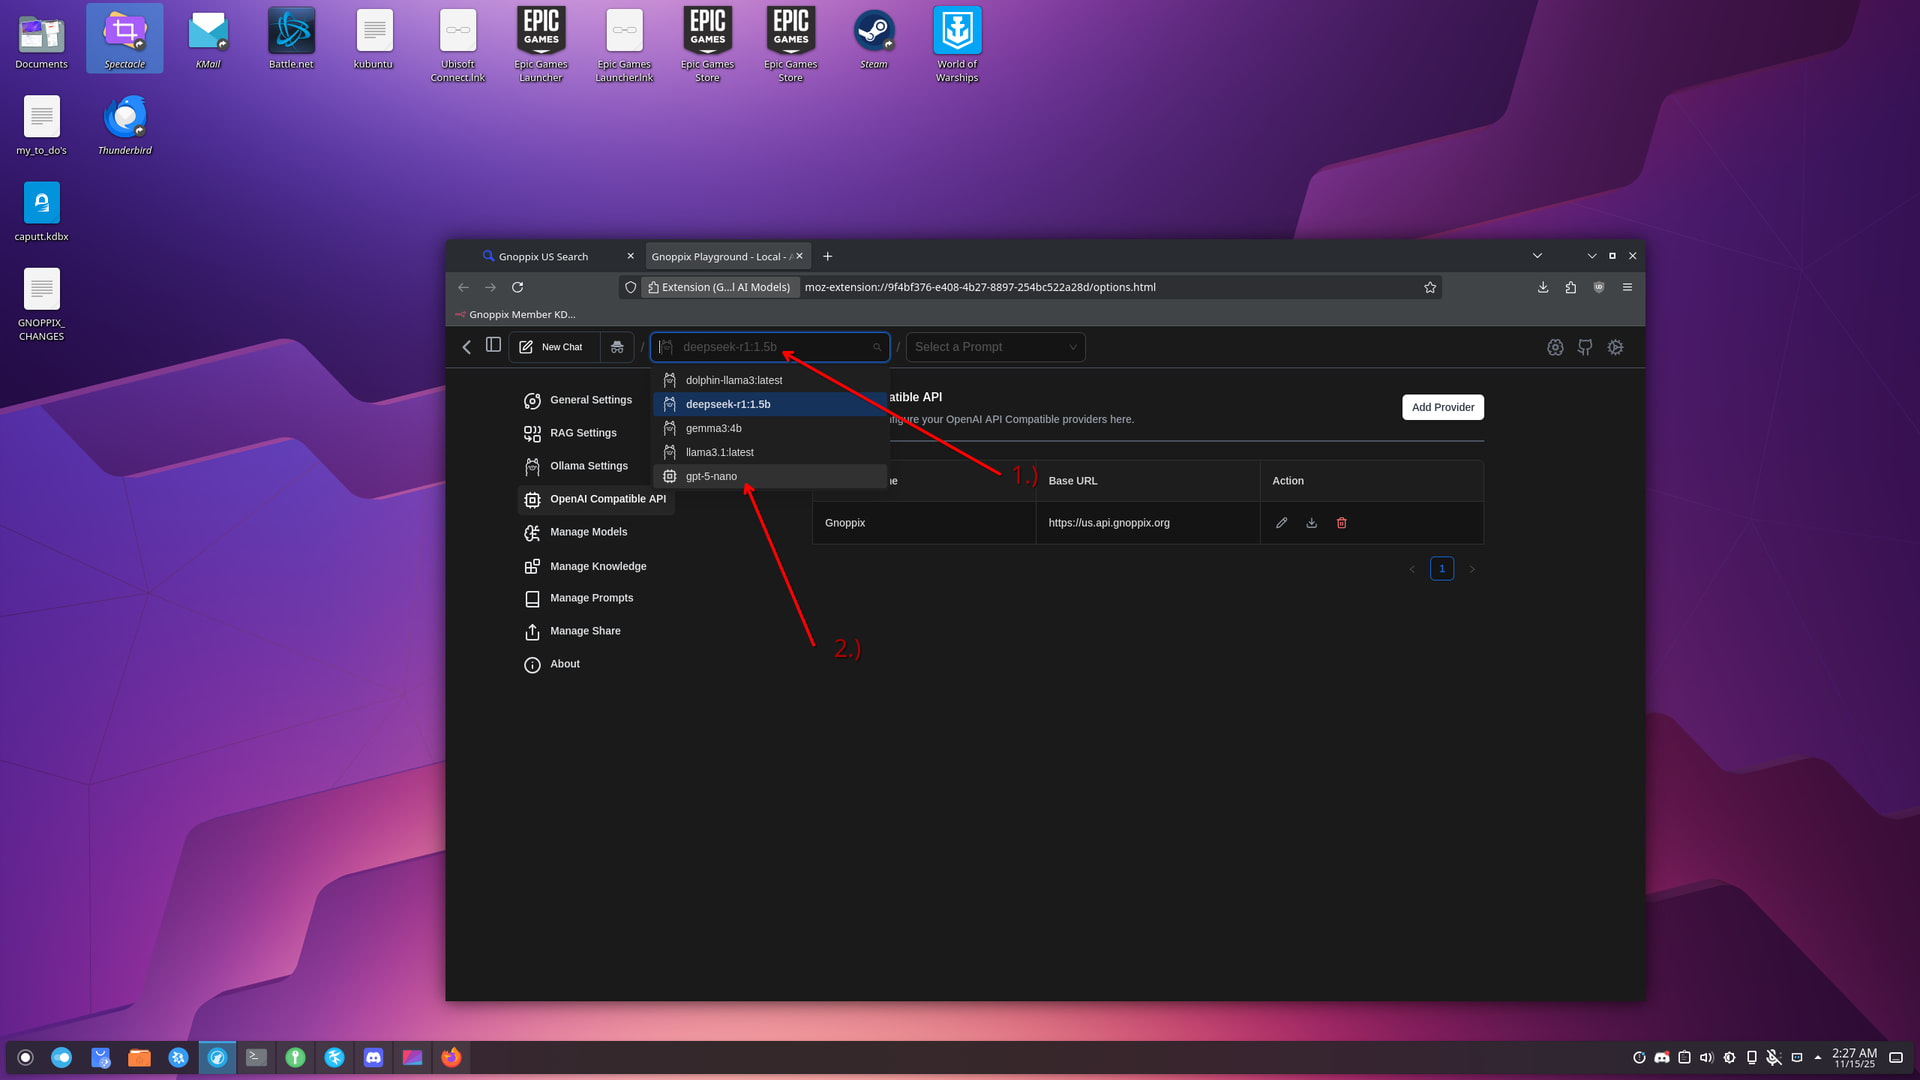
Step 7.)

- A new Window Open you can Filter models on 1.) in this case i want add GPT-5
- Click on 2.) the model you want to use and click on 3.) to save it. Repeat if you want add more models.
Step 8.)
- When you have successfully added your Model you can choose it from 1.) just click the model you want to use.
Step 9.)
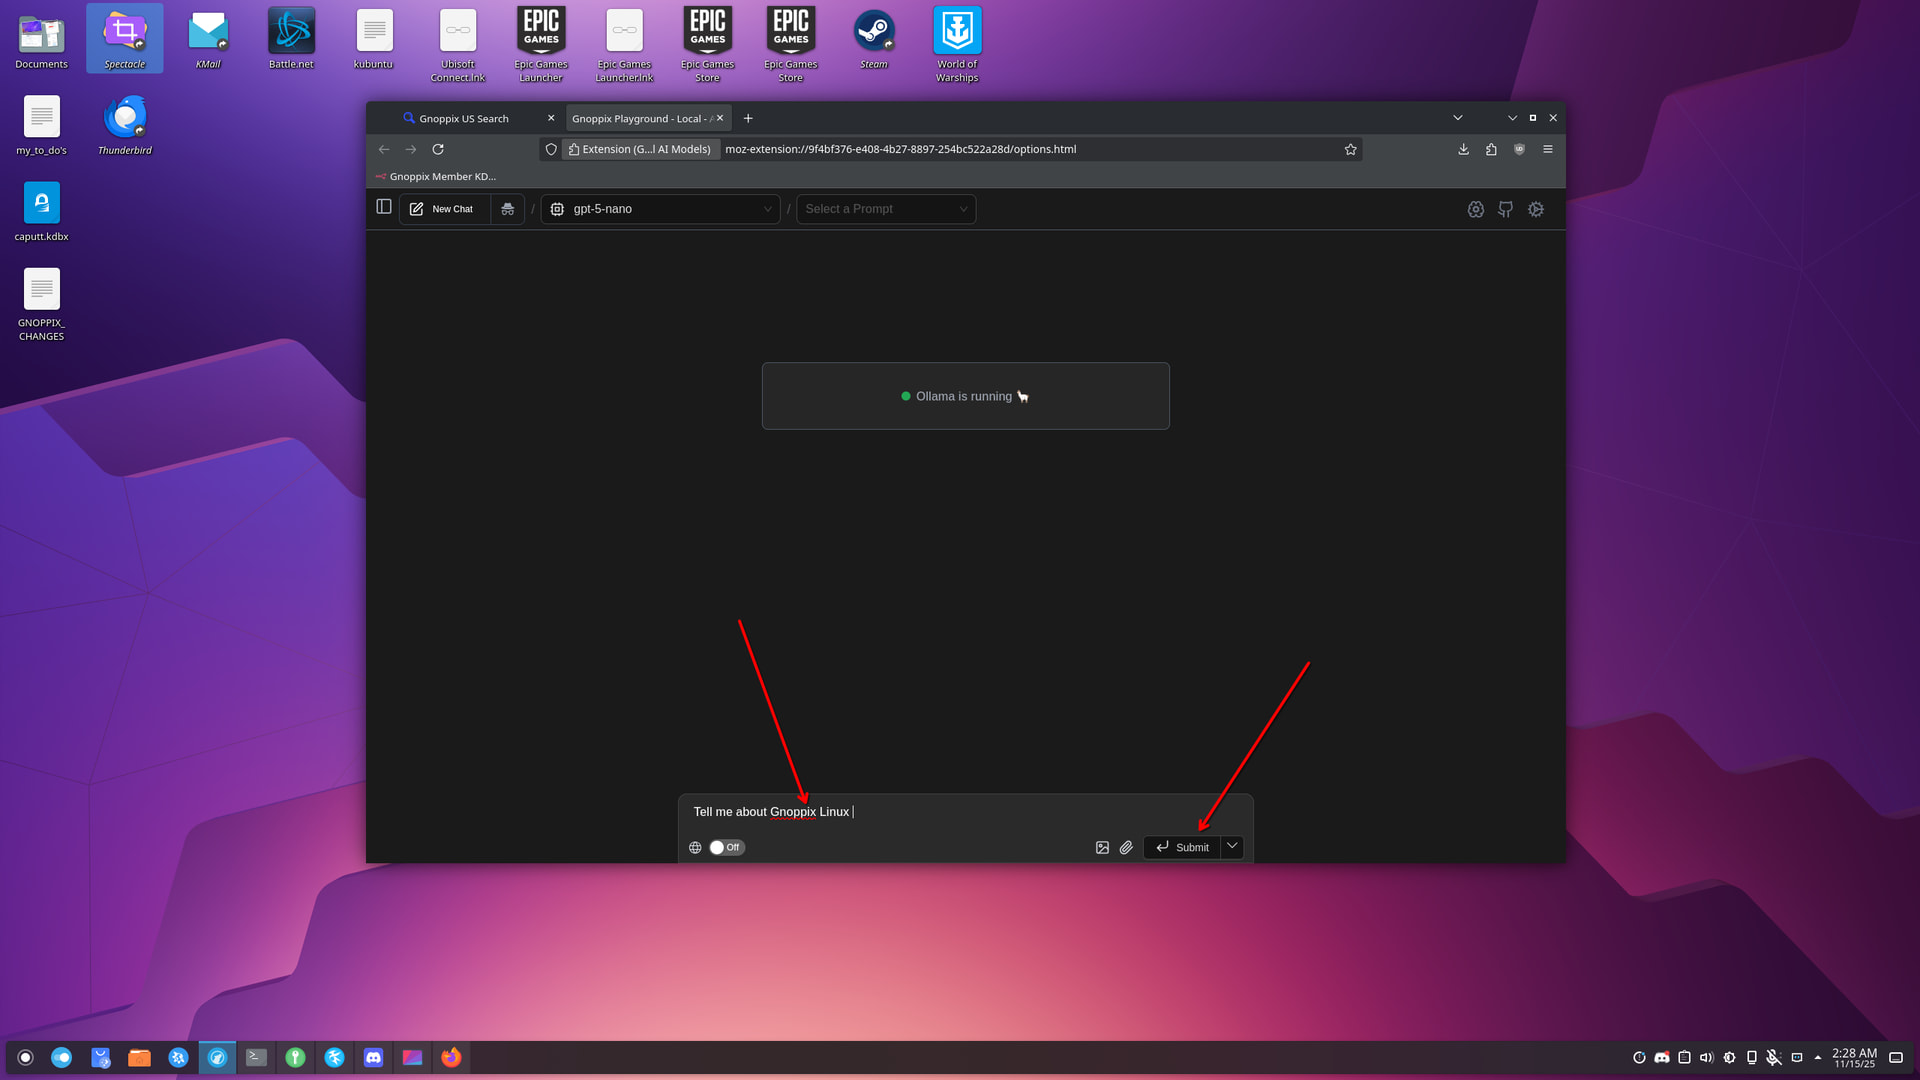
- Enter your prompt and click to Submit.
Step 10.)

just try …
Step 11.)
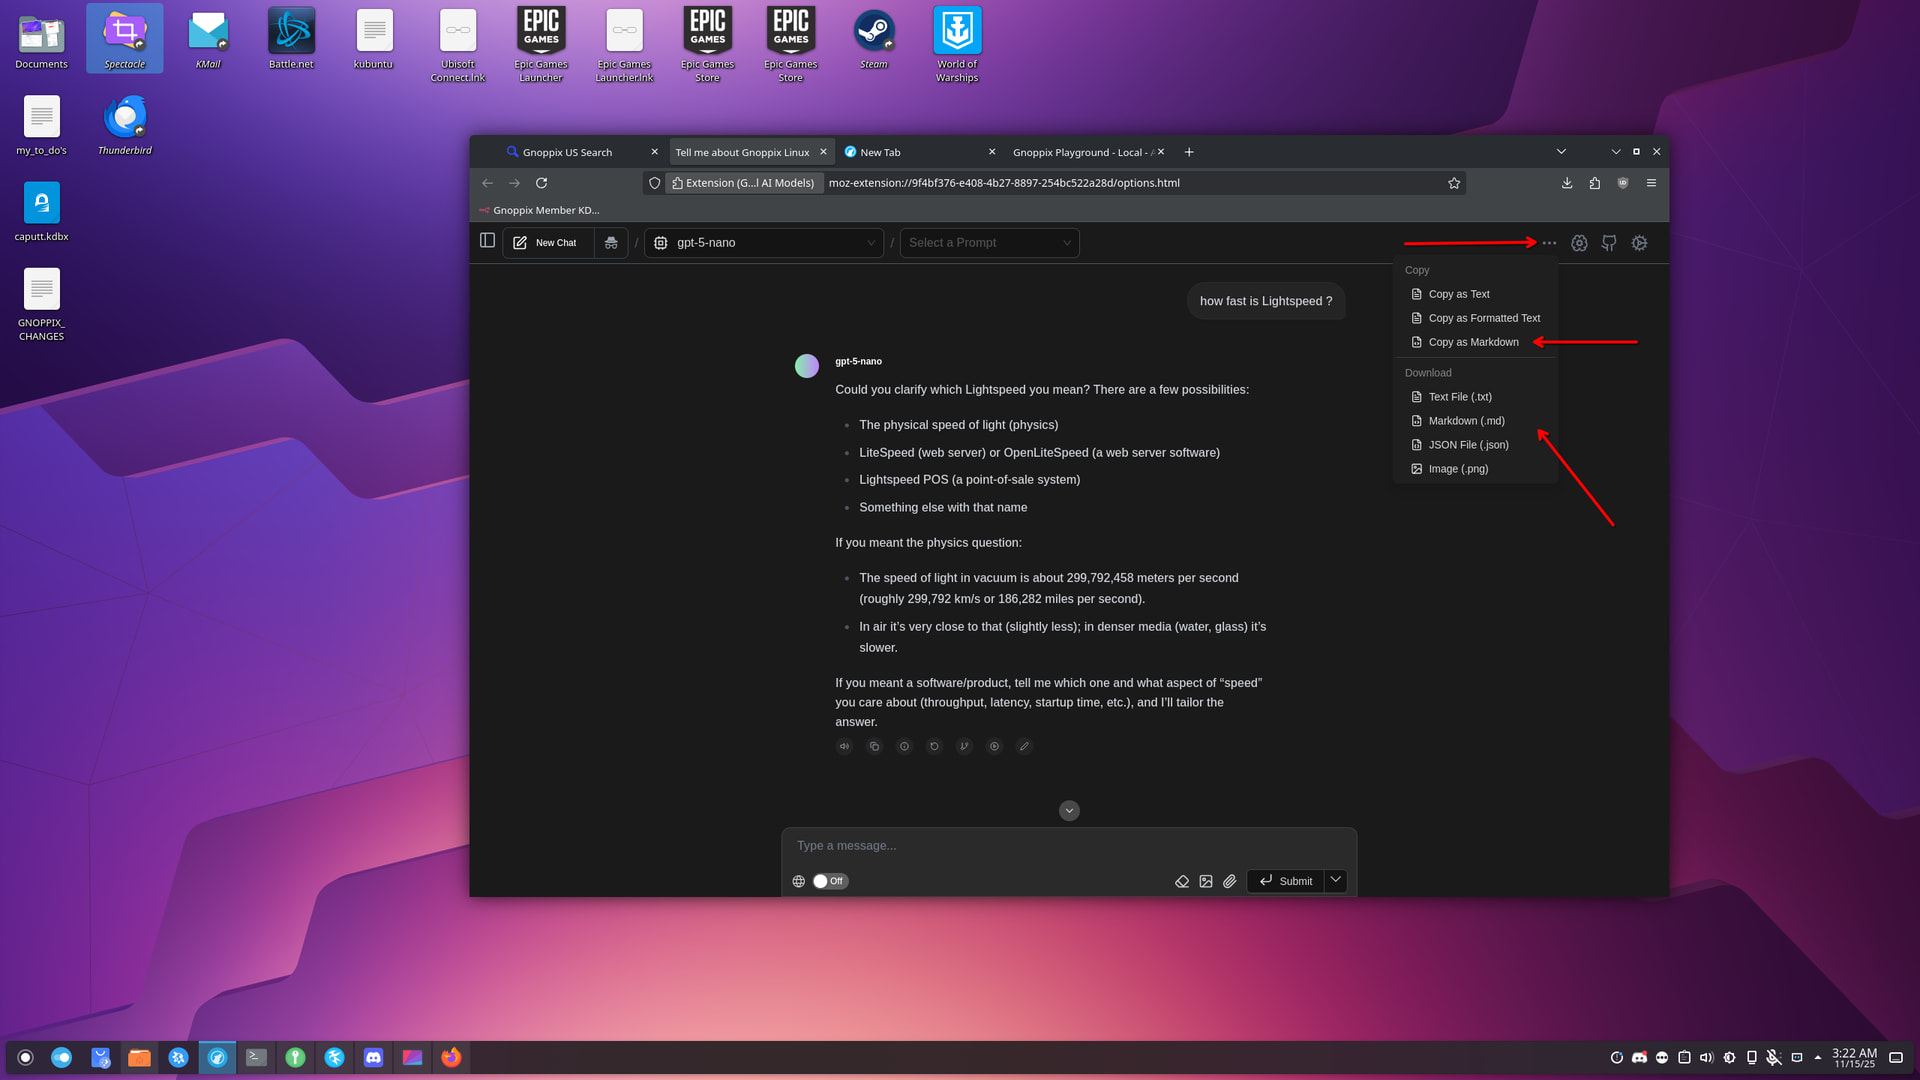
- Of course you can download in different formats or copy the output in different formats …
Here you can download or get an API Key → https://landing.gnoppix.com